
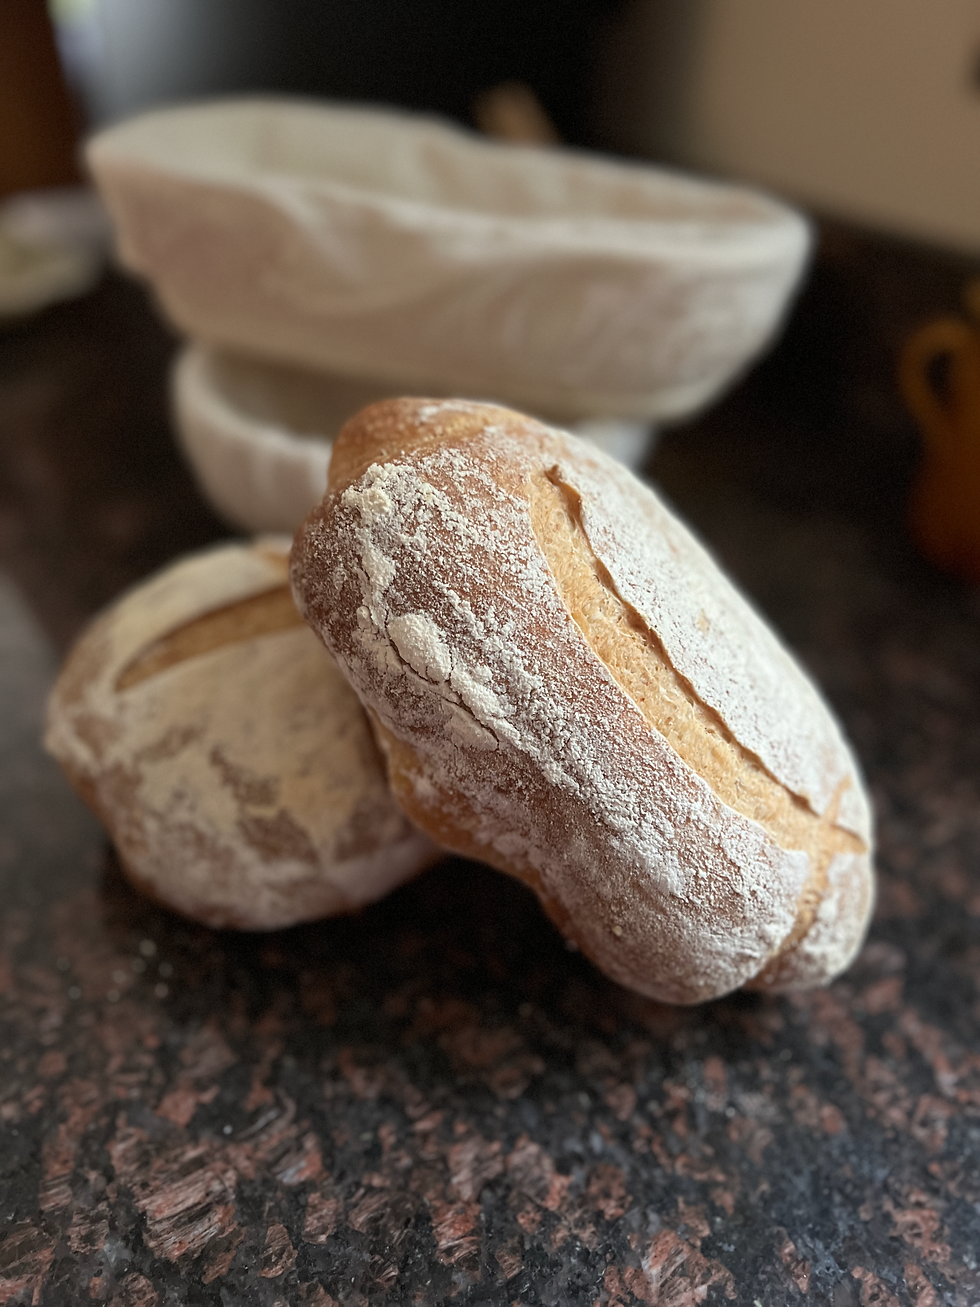
Simple Everyday Sourdough Bread
- Oct 15, 2025
- 4 min read
Updated: Apr 24
Making sourdough bread has become kind of a thing since COVID, but I've been making bread since 2004.
I got interested in making my own bread when I realized how simple the ingredients were, and how much better the bread tasted. For a year, I practiced making bread (and, of course, lots of bread leftover recipes). I froze the good loaves, made plenty of notes, and even did an apprenticeship with a well-known bakery at the time, working the overnight shifts to learn the bread-making process.
Nothing matched the experience. The process of understanding how the dough should look, feel, smell, and react. Once I got into a rhythm, I didn't even need to use a recipe.
I used a natural starter, which I babied and grew from scratch. I diligently looked after it, fed it, and kept it going. I even froze some of my starter just in case something happened to the starter I was working with.
When I moved from Boston to Seattle, I took some of my starter with me, while leaving some with family and friends. I intended to continue to make bread, and then I had the bread in Seattle. Nothing compared.
At your local grocery store, you could find real bread made from the simple ingredients of flour, water, salt, and yeast. I was in heaven...and I stopped making bread.
It wasn't until I returned to Massachusetts that I found myself craving the crispy crust and flavorful inside of homemade bread.
Today I use a starter that is only about 7 years old. I'd started others, but didn't keep up with them, then while living on Cape Cod, I got serious again. Now I make my everyday sourdough bread just about every week, and love every minute of it.
Here's my stretch and fold recipe that I use, inspired by the King Arthur Best Everyday Sourdough. It is so easy. Check out the video from King Arthur Baking to get started. Then make it your own.
Makes 1 smallish sourdough loaf
20 grams of Sourdough Starter
200 grams of water
425 grams of Bread Flour
50 grams of Spelt Flour
25 grams of Wheat Germ
5 grams of Salt
In a bowl, mix the ingredients together until you get a shaggy dough. Let it sit covered for 15 minutes.
Pick up the dough and fold it in on itself three to four times. Let it sit covered for 15 minutes.
Repeat step 2 two more times for a total of 1 hour.
Let rest covered, and start to rise.
When approximately doubled, take it out of the bowl or container you are using, and shape it into your loaf. Place into a baking basket or another bowl.
Refrigerate overnight.
Take the dough out about 2 hours before you are going to bake it so it comes back up to temperature. If it didn't rise a lot, you can let it sit longer until it is bouncy to the touch.
Preheat your oven to 450°F. If you are using a cast-iron pot to cook your bread, place the pot in the oven to heat up. If you are using just a pizza stone or even a baking tray, place that in the oven to heat up as well.
Once the oven is heated and the bread dough is ready, remove it from the container or baking basket, and place it into the preheated pot or onto the preheated stone.
Spritz your oven with water. Shut the door. Repeat the spritzing process two more times.
Reduce the heat to 425°F and bake for between 30-45 minutes until it is dark and sounds hollow when you tap on the bottom. If you are using a pot, take it out of the pot for the last 15 minutes and finish directly on the oven racks.
When cooked, remove from the oven, and let cool for at least 1 hour before cutting.
Enjoy!
I know it sounds complicated, but take it step by step and practice. Soon you will be making your own version of my everyday sourdough bread.
Go out and bake something amazing today!
Frequently Asked Questions
What ingredients do I need for this sourdough bread?
This recipe requires simple, high-quality ingredients: sourdough starter (20g), water (200g), bread flour (425g), spelt flour (50g), wheat germ (25g), and salt (5g).
How long does the fermentation and rising process take?
The initial "stretch and fold" phase takes about 1 hour. After that, the dough rests until it doubles in size. It is then shaped and placed in the refrigerator to proof overnight.
Do I need to preheat the oven and my baking vessel?
Yes. Preheat your oven to 450°F. If you are using a cast-iron pot (Dutch oven), pizza stone, or baking tray, place it inside the oven while it preheats so the dough hits a hot surface immediately.
Why do I need to spritz the oven with water?
Spritzing the oven with water creates steam, which is essential for developing a crispy, professional-style crust. The recipe recommends spritzing three times right after placing the dough in the oven.
How can I tell when the bread is finished baking?
The bread is done when the crust is dark, and it sounds hollow when you tap the bottom. Usually, this takes 30-45 minutes. For an extra crispy crust, you can remove it from the pot for the final 15 minutes of baking.
How long should I wait to cut the bread after it's baked? It is important to let the bread cool for at least one hour before slicing. This allows the internal structure to set and prevents the bread from becoming gummy.
About Jen and her Recipes
As the creator of Appetite for Life, Jen Vondenbrink combines years of professional culinary expertise with a passion for intentional, small-batch cooking. From running bakeries in Massachusetts to studying at the King Arthur Baking School, Jen focuses on making cooking for one or two a "small luxury" rather than a chore. Every recipe is kitchen-tested to ensure you can achieve professional-quality results with confidence and wit.


Comments