
The Secret to a Seriously Delicious Thanksgiving Turkey: It's All in the Prep!
- Nov 21, 2025
- 3 min read
Happy Thanksgiving! I know that taking on the Thanksgiving turkey is the most daunting part of the holiday meal for so many of you. But I promise, with a little organization and planning, you can absolutely achieve a beautiful, juicy, and flavorful centerpiece for your table!
The key to a successful turkey isn't just about the time it spends in the oven; it's about what happens before it even sees the heat.
Thawing Your Thanksgiving Turkey Safely
If you're using a frozen bird, you must start this process early. This is not the time for shortcuts, as thawing incorrectly can be a safety issue.
Refrigerator Thaw: This is the easiest and safest method. Keep the turkey in its original packaging and place it in a pan or dish to catch any juices. It requires 24 hours for every 5 pounds of turkey. For example, a 12-15 pound turkey, you'll need about 2 1/2 to 3 days to thaw your turkey.
Cold Water Thaw: This is quicker, but it takes more attention. Keep the turkey in its original packaging and an additional plastic bag for extra precaution. Submerge the turkey completely in cold water in a sanitized container or your sink. You must change the water every 30 minutes. It takes approximately 30 minutes per pound. A 12-15 pound turkey will take about 6 to 7 1/2 hours.
Important: You must cook the turkey immediately after thawing with this method.
Preparing for the Perfect Skin and Flavor
Once your turkey is thawed, the next steps are all about locking in flavor and guaranteeing that coveted crispy, golden-brown skin. This process starts a day or two before you roast!
Dry Brine/Season Early: Whether you use a wet brine or a dry brine/salt rub is a personal choice, but both the Barefoot Contessa (Ina Garten) and America's Test Kitchen agree that salting and seasoning the turkey ahead of time is essential for a juicy, flavorful bird. I like to mix salt, pepper, and dried herbs like sage, rosemary, and thyme.
Air Dry (The Secret Weapon): After seasoning, many experts—including Ina Garten and America's Test Kitchen—recommend leaving the turkey uncovered in the refrigerator for 1 to 2 days. This air-drying step is the absolute key to a dry skin that will crisp up beautifully when it roasts. This isn’t something my mother ever did, but now that I’ve done it, I wouldn’t do it any other way.
Rub with Fat: Before it goes in the oven, you'll want to rub the bird down with a fat like softened butter or a mixture of herbs and olive oil. To help that breast meat stay tender and juicy, try to loosen the skin and rub some of the fat and herbs directly underneath the skin.
Roasting for Perfection
Start Hot, Then Cool: I like to start my turkey in a hot oven, about 450°F, to get a blast of heat that starts the browning process. After a short time (30 minutes), you reduce the temperature to 350°F to continue roasting.
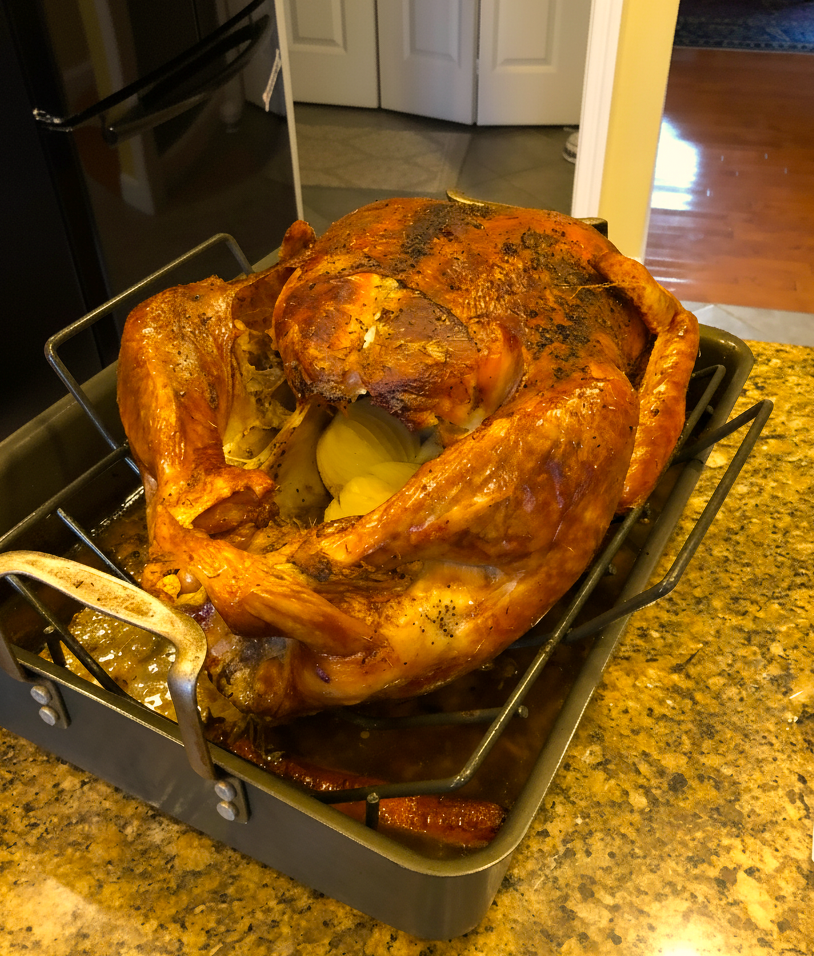
Elevate the Bird: Place your turkey on a bed of vegetables (like carrots and celery) or a roasting rack in the pan. This allows for better airflow, which helps the turkey cook more evenly and results in crispier skin. I like using carrots, celery, and onions because I add water or stock as well to help the turkey stay moist. The vegetables flavor the stock and the drippings, making a tastier gravy.
To Baste or Not to Baste? Many experts say skip the basting. Every time you open the oven, you lose heat, which slows down the cooking and can actually dry out your bird. The fat rub you did earlier, and adding the water or stock, is enough to keep things moist!
Protect the Breast: The breast meat is lean and cooks faster than the dark meat. To prevent the breast from drying out, you can cook the turkey with the legs toward the back of the oven if your oven is large enough, or loosely cover it with foil (tent it, meaning it only loosely covers the bird) during the last hour or so of roasting, or if it begins to brown too quickly.
Use a Thermometer: This is the most critical step to ensure safety and juiciness! Your turkey is done when a meat thermometer inserted into the thickest part of the breast reads 165°F and the thickest part of the thigh reads 175°F. Don't touch the bone!
The All-Important Rest: Once cooked, you must let your turkey rest, uncovered, for 20 to 40 minutes. This allows the muscle fibers to relax and reabsorb the juices, ensuring they stay in the meat and not on your carving board. It will still be piping hot.
Here's my recipe for prepping your Thanksgiving Turkey. Happy cooking!


The perfect way to cook a turkey!